


Follow these steps to invite user access to the Washington Department of Revenue in order to file business licensing and excise tax returns.
We recommend that our clients follow these steps so that we are not accessing your administrative access to SAW for security purposes. Client’s should retain overall administrative access and only invite our team to access accounts as needed with Account Manager access.
Sign in through SAW
- Navigate to Secure Access Washington
- If you haven’t already registered, you will need to click “Sign Up!” and follow the steps to register and claim administrator access to your account. To do this, you will need to enter the Letter ID received on your initial communication from the WA DOR regarding your filing requirements and frequency. Reach out if you have any questions regarding business startup and licensing services.
- Sign in to your SAW account.

Access My DOR Services
- If you haven’t already, click “ADD A NEW SERVICE” and browse for: Business Licensing and Taxes provided by Department of Revenue. Add this service to your SAW Agencies list.
- Click “Access Now” on the service for Business Licensing and Taxes provided by Department of Revenue.
- Choose method to verify the Multi-Factor Authentication.
- Continue to access the Department of Revenue platform.

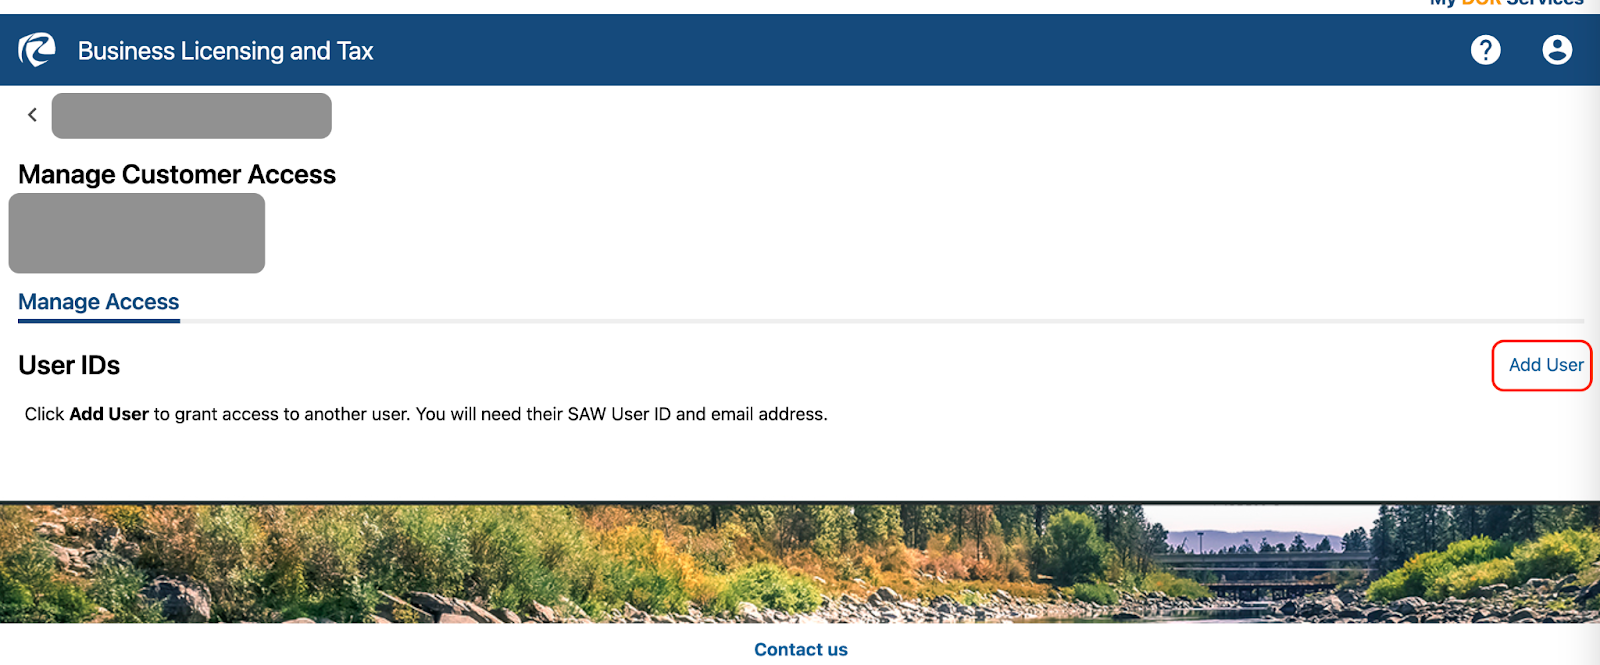
Add New User
- Once you are in your company’s access to the Business Licensing and Tax section. Select “More Options”.
- Click: “Add or Remove Other User’s Access”.
- Note: If you do not see this option, you are not signed in with Administrator access to your company. Either you or someone else already set this up using a different SAW username and password. Work with WA DOR if needed to access your administrator account access.
- Click “Add User” on the far right.
- Enter the SAW User ID and email address of the user you wish to invite.
- Choose the customer access type (permissions level) you wish for this user. At NPA, we prefer the company owner to retain the Administrator access for security reasons and only invite our team to Account Manager access.
- Select the Legal Entity Accounts you would like this new user to have access to.
- Review the Verification screen. Click Submit.
- Save the Confirmation page for your records. Click OK.


That’s it, you’re done! You can follow these steps any time to add and remove access to accounts as needed.